

How to setup in IntelliJ IDEA
JPedal is a Java PDF library that allows developers to view, print, rasterize, extract content from, and edit PDF files in their own Java applications. Whilst the library has a multitude of classes to access these features, you will likely want to add the functionality to your own system or maybe expand on what is provided. This can be done with an IDE such as IntelliJ IDEA.
This tutorial will show you how to set up a project and start using JPedal in IntelliJ IDEA using a sample JPedal class.
Please note: A trial or full copy of the JPedal jar is needed. You can download the trial jar from here.
Step 1 - Download and install IntelliJ IDEA:
If you haven’t already, download the latest copy of IntelliJ IDEA.

Step 2 - Create a project:
Once you have gone through the installation process, open up IntelliJ IDEA and click on menu option: File -> New -> Project
Select Java, name your project, set the build system to IntelliJ, choose a JDK of Java 17 or above, and click Create.
Step 3 - Add the JPedal JAR:
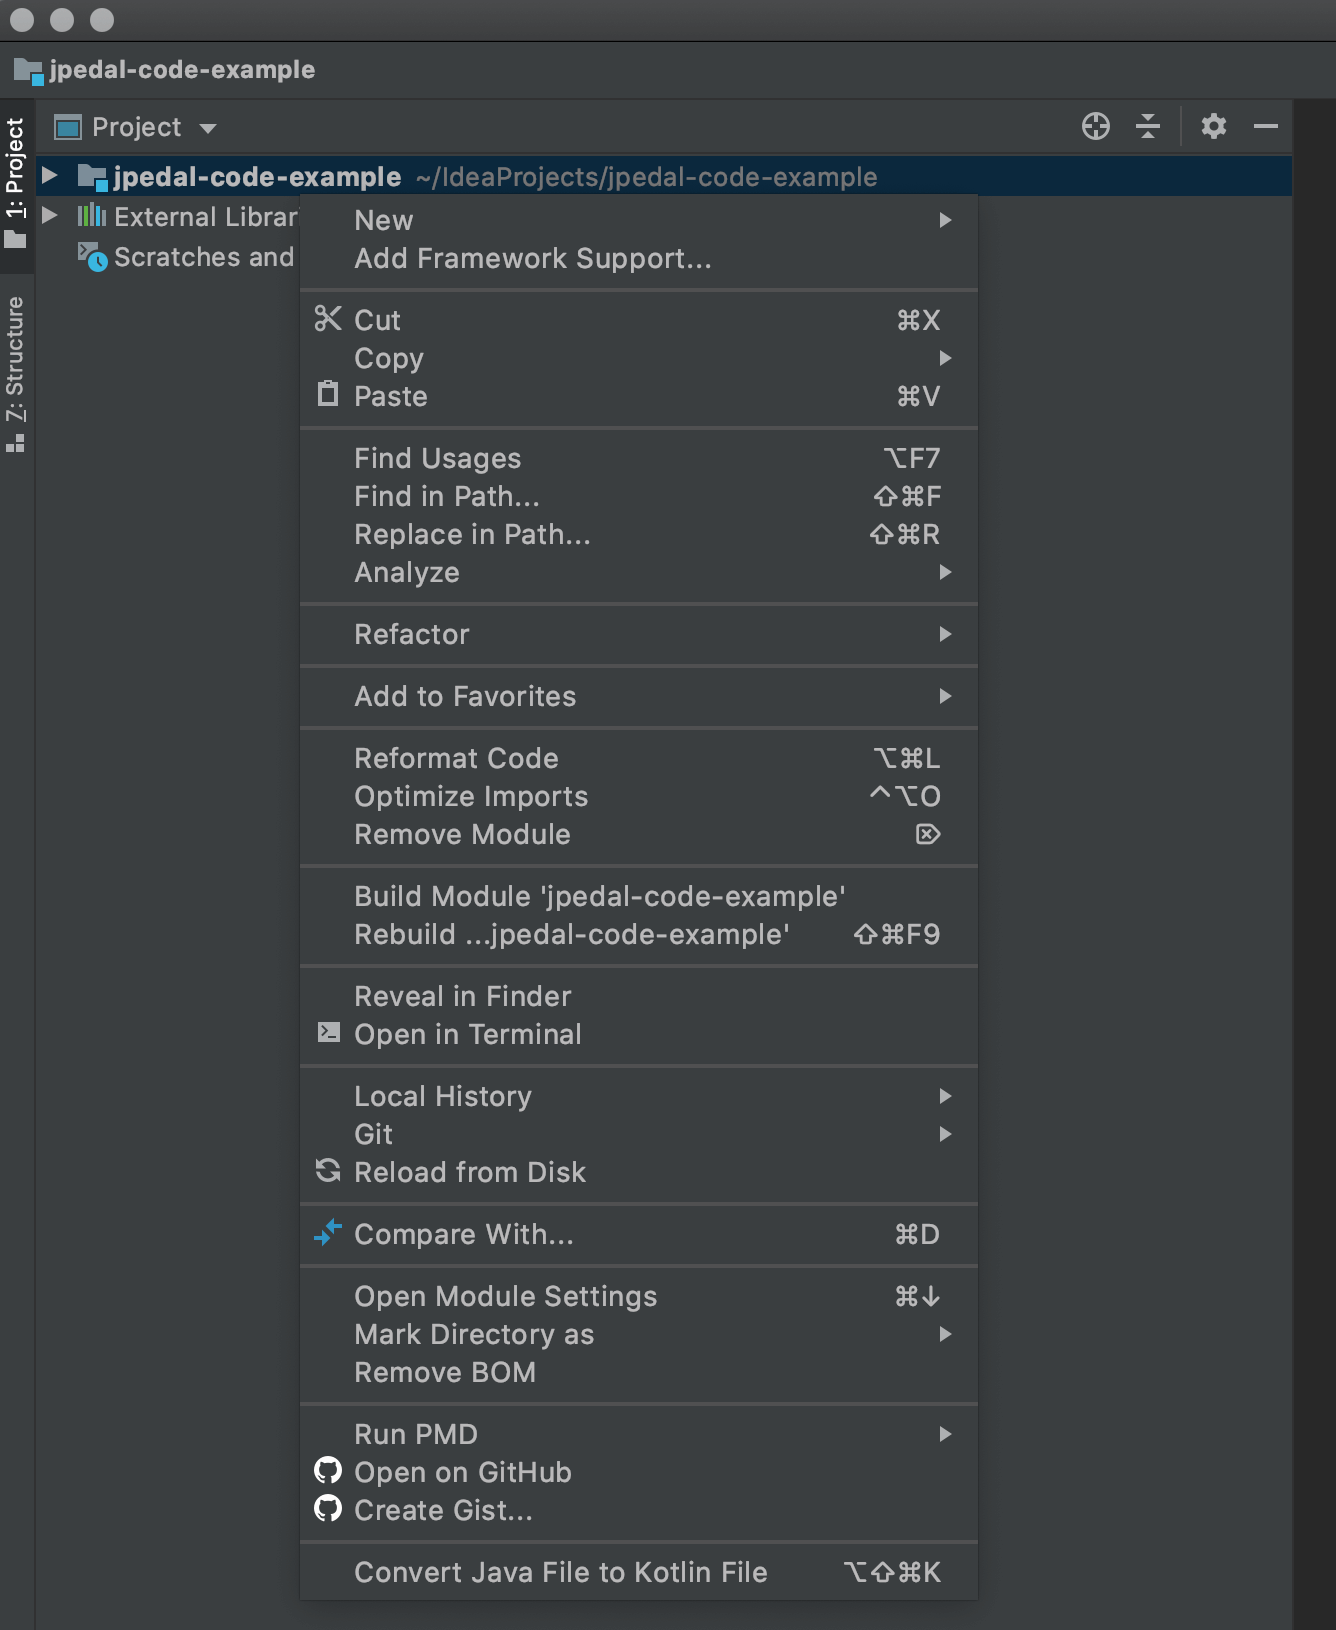
In the project pane in the IDE bring up the context menu (right-click) for the project folder and select Open Module Settings.
In the settings window, go to the libraries tab and click the ‘+’ button and select Java.
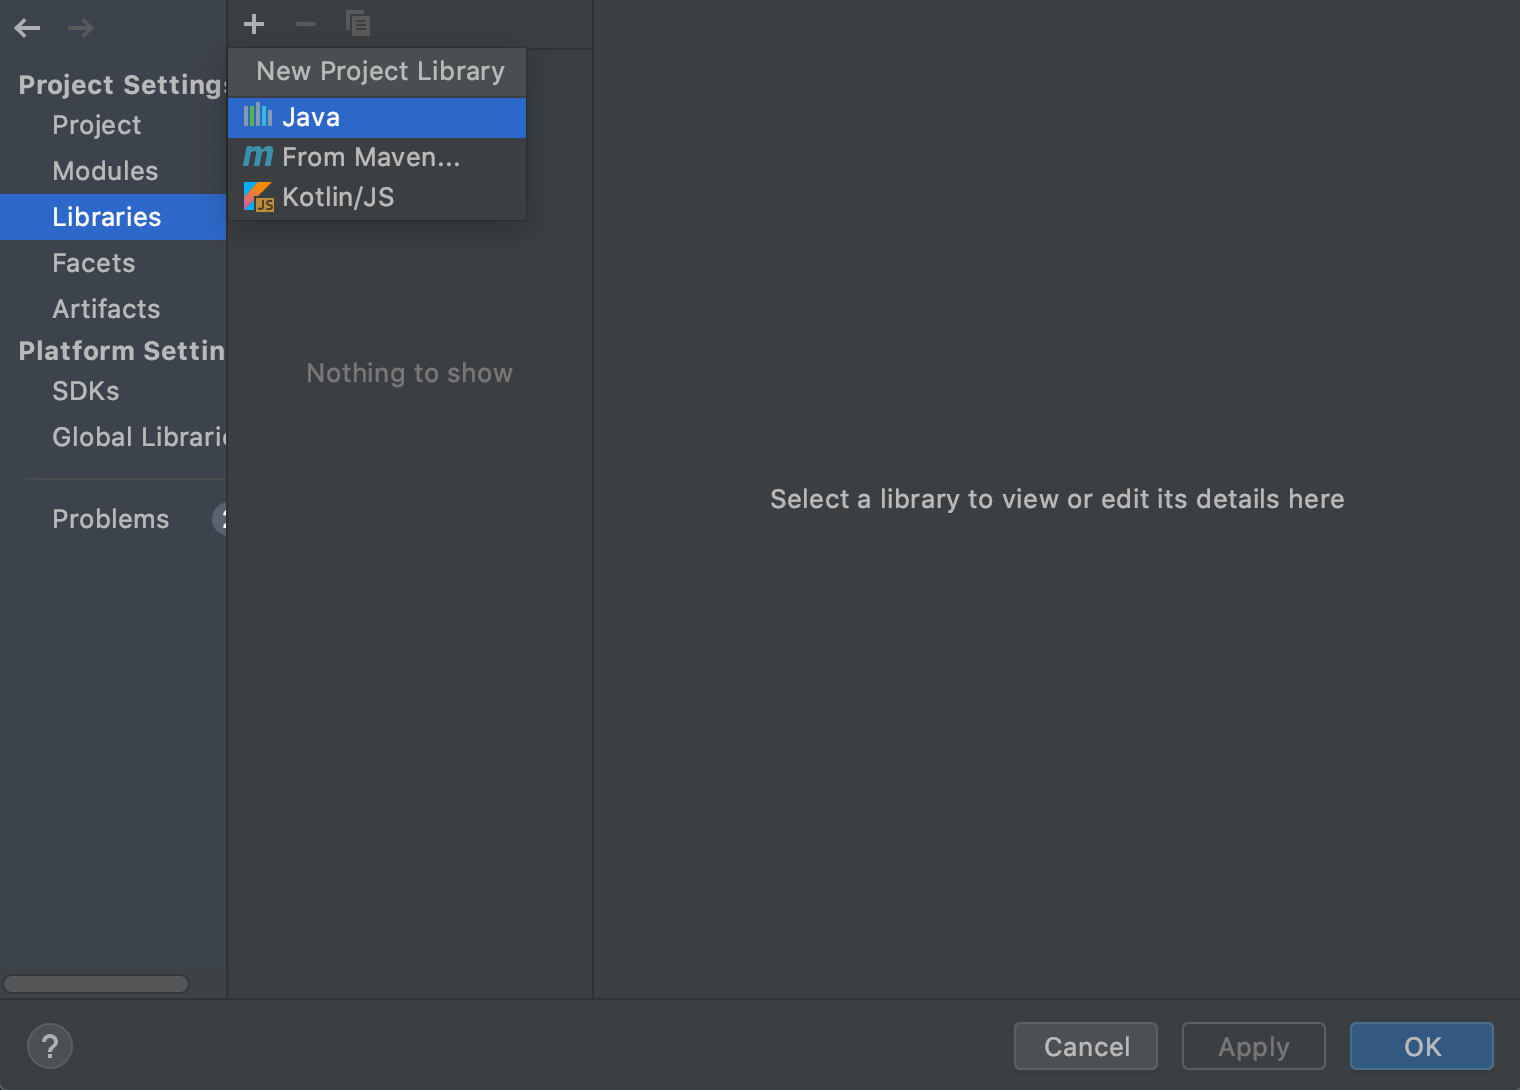
In the file-finder that opens, select your JPedal jar and you are done.
Step 4 - Start coding:
Create a new class called JPedalExamples in the project’s src folder and paste in the following code:
import org.jpedal.examples.images.ConvertPagesToImages;
import org.jpedal.examples.images.ExtractImages;
import org.jpedal.examples.text.ExtractTextInRectangle;
import org.jpedal.examples.viewer.Viewer;
import org.jpedal.examples.viewer.ViewerCommands;
import org.jpedal.exception.PdfException;

public class JPedalExamples {

    public static void main(String[] args) {
        try {
            pdfToImage();
//            pdfViewer();
//            extractText();
//            extractImages();
        } catch (final PdfException e) {
            e.printStackTrace();
        }
    }

    public static void pdfToImage() throws PdfException {
        ConvertPagesToImages.writeAllPagesAsImagesToDir("inputFile.pdf", "outputFolder", "png", 1.33f);
    }

    public static void pdfViewer() {
        final Viewer viewer = new Viewer();
        viewer.setupViewer();
        viewer.executeCommand(ViewerCommands.OPENFILE, "inputFile.pdf");
    }

    public static void extractText() throws PdfException {
        ExtractTextInRectangle.writeAllTextToDir("inputFile.pdf", null, "outputFolder", -1,
                ExtractTextInRectangle.OUTPUT_FORMAT.TXT, false);
    }

    public static void extractImages() throws PdfException {
        ExtractImages.writeAllImagesToDir("inputFile.pdf", "outputFolder", "png", true, false);
    }
}
Change inputFile.pdf and outputFolder to the full paths of your input file and output directory, then uncomment the method you would like to run in main.
IntelliJ by default will build the project when you want to run your code which can be done by setting up a configuration or you can right-click a class with a main method and select Run from the context menu.
Want to add more to your project?
Check out the following tutorials for more information to see what JPedal can do for you:
- Convert PDF to an Image
- View PDF in Java
- Print PDF from Java
- Search the Text in PDF
- Extract Text from PDF
- Extract Images from PDF
- Extract Metadata from PDF
- Edit PDF Form Annotations